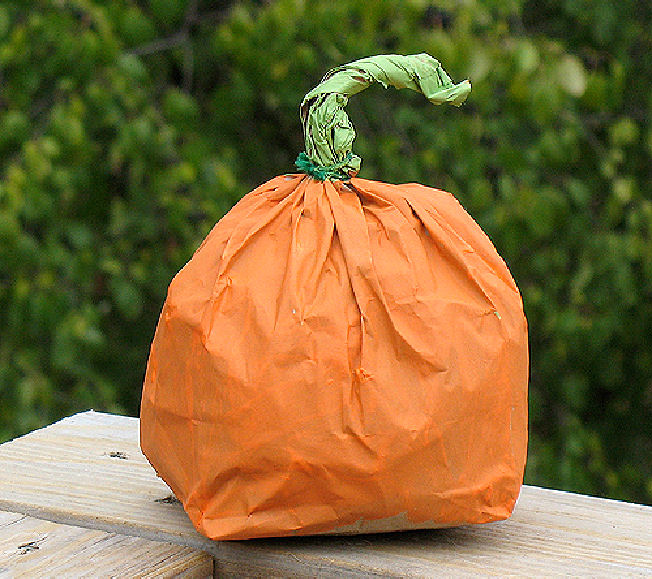
Paper Bag Pumpkins
Materials:
Lunch size paper bags, Orange paint, Green paint,
Newspaper, Construction Paper, String
Directions:
Have the children crumple up newspaper
and stuff their paper bagsso they are full.
Twist the unstuffed part of the bag and
tie at the bottom to make a stem.
Let the children paint their pumpkins.
When they are dry, the children can draw faces on them.
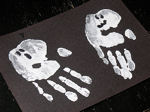
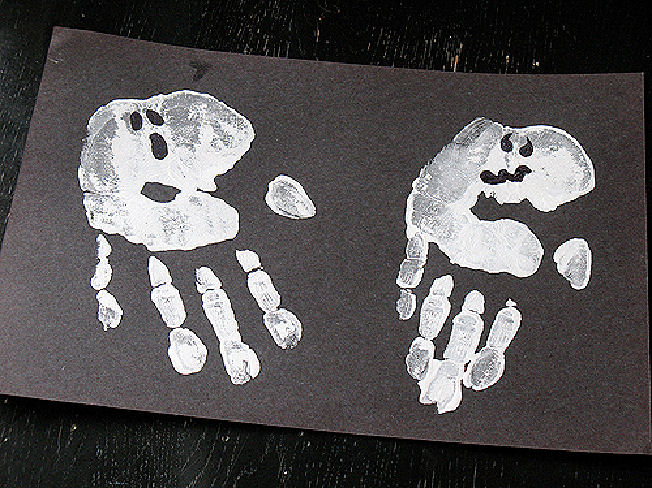
Handprint Ghosts
Have the children paint their hands white and press onto black construction paper. When they dry have the children turn them upside down and add faces.
This craft was originally published on ChildFun.com,
and was updated with these photos by our friend,
Amanda Formaro of Crafts By Amanda!
MoreHalloweenCrafts
Place mats/Counters
Find an appropriate haunted house pattern. Make several copies and color, decorate, and laminate them as place mats. Find white lima beans at the grocery store and turn them into ghost counters. Add eyes and mouth to the beans and you have a great math center for Halloween. Have the kids put the ghosts in the haunted house and count them as they go.
Ghost Callers/Ghost Hunt
Materials:
Two ghosts; draw them or use two ghost figures.
Directions:
Cut white construction paper into 4″x5″ pieces. Roll and tape to form tubes.
These are the ghost callers. Make one for each child.
1. Go on a ghost hunt. Show everyone the two ghosts. Have children close their eyes. Teacher hides the ghosts.
2. Children open eyes and count 1-2-3 GHOST! On the count of “ghost” the hunt begins.
3. The children who find the two ghosts sit by the teacher. Give them a ghost caller and let them make ghost noises for the next ghost hunt. The noise helps call the ghosts from their hiding places.
4. Continue until all children are making ghost noises.
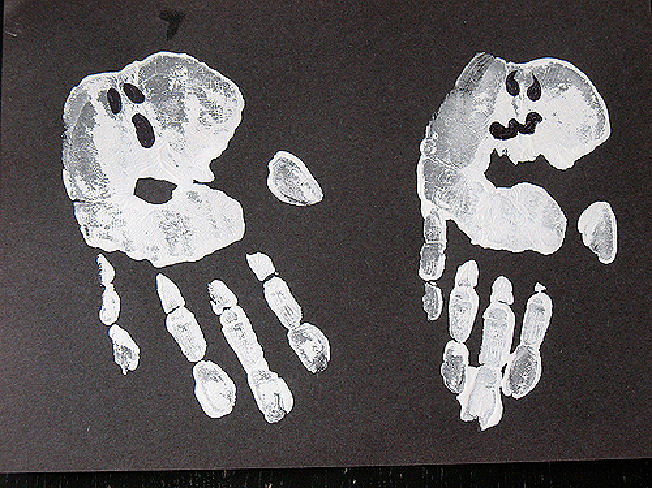
Handprint ghosts
Have the children paint their hands white and press onto black construction paper. When they dry have the children turn them upside down and add faces.
Leaf Witches
Have children glue down pressed leaves on construction paper for witches body. Then allow them to fill in their own features on the witch. Perhaps they would like to have the witch riding on her broom or standing next to her brew.
Trick-or-Treat bags
Provide large paper bags. Fold down twice, staple handle on, and let children decorate front and back. I always provide stickers also for the children
Ghost Magnet
Make a ghost cut out of black construction paper and place in an old oatmeal canister with one teaspoon white paint and marbles and shake. Makes a really cute spooky ghost. Mount them on fun foam and add glitter and a magnet for a spooky fridge magnet.
Spooky Spider Webs
Put a paper plate in a pie pan and give the student a small dab of black paint. You can also paint a paper plate black and do the activity with the white paint to look more realistic. After the small dab of paint is placed on the student’s plate, drop a marble in and let the child move the pie pan in all different directions to make a spooky spider web. After it has dried, punch a hole in the plate and attach a plastic spider ring or sponge paint a spider in the web.
Rattling Skeletons
Use white paper to form 5 paper chains, and then connect to make a skeleton. Trace children’s hands and feet on white paper, cut and glue to the ends of the arms and legs. Cut an oval shape and draw on the face. These work best when made with small groups of children.
Tempera Paint Spider Webs
Using runny black paint, allow the children to use a straw to blow the paint across the page to make a spider’s web.
Glue Ghosts
Have the child draw a ghost outline on a piece of waxed paper, and then have them fill in the outline with white school glue. Dry overnight, and then have the child add facial features. Place on a string and you have a spooky ghost necklace.
Giggly Ghosts
Materials:
Quilt batting Narrow elastic Construction paper Glue
Directions:
Have the children tear off a wad of the quilt batting. Have the children form the “ghost” any way they want. Next, have the children cut eyes, legs, arms, etc. from the construction paper and glue onto their ghost. Finally, cut some of the elastic and tape to the top of the ghosts and hang them from the ceiling. The kids love to watch them bob up and down.
Halloween Pasta Collage
Check out your local grocery store, Michael’s, Trader Joe’s, or Ben Franklin craft store to find pasta in Halloween shapes. Let your kids create a cool collage with the pasta and whatever else you decide to add.
Halloween Cookie Cutter Prints
Buy an assortment of Halloween cookie cutters. Let the children dip the cookie cutters into paint and then press onto paper.
Halloween Pasta Necklaces
Find Halloween shaped pasta. Let your children string the pasta shapes on a piece of yarn to create a necklace or bracelet.
Footprint Ghosts
Paint each child’s foot with white paint and print it on a black sheet of construction paper. When it dries add eyes to the heel part of the foot.
That will be the ghost’s head.
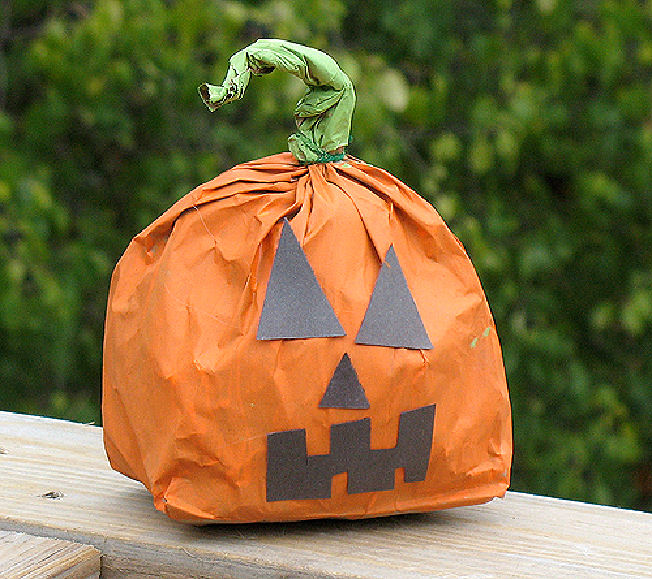
Paper Bag Pumpkins
Materials:
Lunch size paper bags, Orange paint, Green paint, Newspaper, String
Directions:
Have the children crumple up newspaper and stuff their paper bags so they are full. Twist the unstuffed part of the bag and tie at the bottom to make a stem. Let the children paint their pumpkins. When they are dry, the children can draw faces on them.
Pumpkin Painting
Buy several small, fresh pumpkins. Cut them in half. Let the children dip the pumpkin halves into paint to make prints.
Spaghetti Cobwebs
Materials:
Cooked spaghetti (cold) White glue Waxed paper
Directions:
Have the children dip the spaghetti into the glue and arrange the pieces onto the waxed paper. When the spaghetti dries, carefully peel the “cobweb” off the waxed paper. Hang from the ceiling.
Directions:
Dilute the white glue with 1/3 -1/2 cups of water. Let the children dip a piece of cheesecloth into the diluted glue. Have the children drape the wet cheesecloth over the 16 oz. cups. Let the “ghosts” dry for two days. Carefully remove the cup from the hardened cheesecloth. Let the children decorate their ghosts. Hang the completed ghosts from the ceiling.
Puffy Paint Cobwebs
Mix equal parts of flour, salt, and water in a large bowl. Pour the mixture into squeeze bottles. Give each child a black paper plate or a piece of black construction paper. Let the children squeeze the white puffy paint onto the black paper. When the puffy paint dries, it will look like glittery cobwebs.
Foot Ghost
Using white paper, have children step on paper and trace around their shoes. To make a face, use crayons, pens, or black construction paper with white chalk.
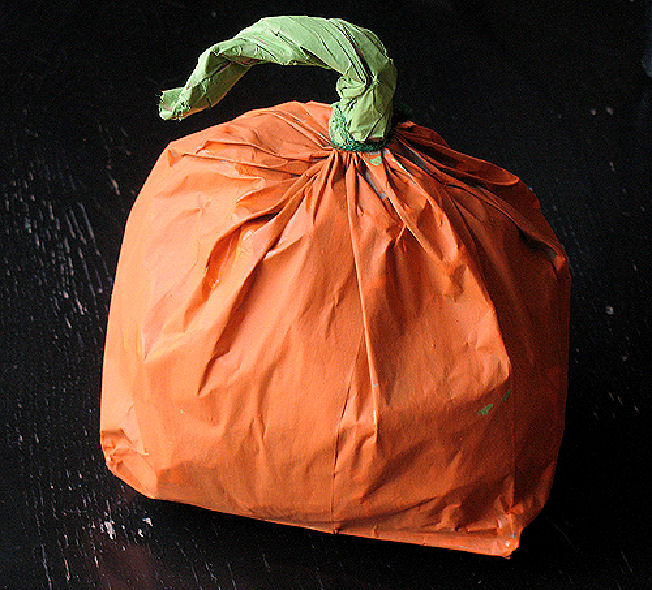
Paper Bag Pumpkin
Using a large grocery bag, crumple newspaper and stuff. Twist top of paperback and tie. Have children paint the bag orange. Paint the face black. Paint stem green.
Shape Ghosts
Materials:
Black tag board Black yarn White lima beans Glue
Directions:
Cut tag board into circles, triangles, and squares, about four or five inches across. Punch a hole in the top of each shape. Cut an 18 in. length of yarn for each child. Explain that the black shapes are ghosts and the beans are ghost eyes. Then the left the children glue of the bean eyes on their ghosts.
Spiders Web
Materials:
String or yarn 6 6 inch pieces of string 4 12 inch pieces of string Diluted white glue or liquid starch Wax paper
Directions:
Let the children dip pieces of string into dishes of glue or starch. Then have them lay their strings on wax paper to create the spider’s web. Lay the string in the shape of a spiral overlapping the ends. Lay the large pieces of string over the spiral in the shape of a cross. When the strings dry, they will become stiff and hold their shapes.
Popcorn Hands
Popcorn Orange and Black Jelly Beans Spider Rings Plastic Gloves(clear serving gloves like the restaurants use) Orange or Black ribbon Fill each finger with a jelly bean or two(will look like nail polish) then proceed with the popcorn until full. Use your ribbon to tie closed at palm and embellish with a spider ring(on the ring finger). You can use these as a craft for your Halloween party or for decoration during the holiday!! The kids love them!
Balloon Jack-o-Lanterns
Blow up an orange balloon for each child. Out of construction paper make face and feet pieces to create a jack-o-lantern. You may apply these pieces to the balloon with rubber cement.
Decorate masks
I buy plastic half masks(found in dollar stores or party stores. Usually you can get 12 in a pack). I then give each child a mask. They then decorate the masks with feathers, stickers or gems found in craft stores. They really enjoy this and like to take the masks home to show mom or dad.
Ghost
Take a tp tube, stand it up and stuff a paper towel in the top, making a rounded mound on top. The child then dips a heavy, white paper towel in liquid starch, squeezes out the excess starch and drapes it over the tube. Have him/her arrange the bottom to looked draped. Add two black dots for eyes near the top. Allow to dry thoroughly. Then,you can remove the tp tube and the ghost is stiff enough to stand alone. Really cute and fairly easy.
Halloween Votives:
Collect one baby food jar, one votive, back & orange tissue paper, glue and paint brush for each child.
Soak labels off of jars. Let the jars dry. Let each child cut tissue paper pieces and glue onto the jar with paint brush…Much like a decoupage. They can make mosaics or even a jack-o-lantern. With permanent marker add child’s name and date to the bottom of the jar. Add a votive. When they get home they have a wonderful, keepsake to use year after year.
Ghost Footprints
Materials:
*white paint in a cookie sheet
*black construction paper
*black circle stickers
*large dishpan of soapy water
*towels
*scissors (optional)
Procedure: Children take off socks & shoes, step onto cookie sheet with white paint (caution: it is very slippery–supervise closely), step onto black construction paper, step into dishpan of soapy water and then dry their feet. After paintings have dried, children stick black stickers onto paintings as the ghosts’ eyes (heelprint will be ghosts’ head). Optional: Cut out ghost footprint.
Halloween Bags
Materials:
*paper lunch bags (white ones look good)
*tissue paper goblins, ghosts, pumpkins, witches hats, cats
*Halloween stickers
*orange & black crepe paper
*orange & black crayons/felt pens
*glue & glue sticks
Procedure: Children decorate their bags.
Halloween Fingerpainting
Materials:
*black or dark blue fingerpaint
*construction paper fences, pumpkins, moon, ghosts
*fingerpainting paper
Procedure: Children fingerpaint on paper then stick on fences, pumpkins, moon, and ghosts.
Variations:
*make table prints instead of fingerpainting on paper.
*make the painting about the ‘Five Little Pumpkins’ and give the children five pumpkins to stick on the fence in their paintings.
Mini Jack-o-lanterns
Materials:
*mini pumpkins
*wallpaper paste (optional: dye orange) & glue sticks
*buttons
*yarn
*cotton balls
*buttons
*black paper witches’ hats
Procedure: Children glue items on pumpkins to make mini ‘Jack-o-Lanterns’.
Pumpkin Patch
Materials:
*brown construction paper
*green yarn *cotton balls
*dry orange tempera paint
*glue & glue sticks
*small bag
Procedure: Shake cotton balls and paint in the bag. Children glue green yarn (vines) and orange cotton balls (pumpkins) onto brown paper to make a pumpkin patch.
Witch Faces
Materials: paper plates yarn cut in approx. 5-6 inch lengths black construction paper cut into the shape of a witch’s hat yellow construction paper cut into buckle shape (hollow rectangle)
Directions: Cut out the center of a paper plate. Glue the yarn on both sides of the paper plate. Glue black hat on top of plate. Glue buckle on hat. Punch a hole on both sides of the plate. Tie string in holes. Tie “mask” on child.
Paper Napkin Ghosts
Have children make paper ghosts from unfolded white paper napkins. Help them place cotton balls in the center of the napkin. Show them how pull down the corners of the napkin over the cotton ball. Tie a piece of white yarn around the “neck”. Use markers to draw a face. Tape a thin piece of string from the top of the head and hang from the ceiling. Paper Plate Bat
Using a small paper plate, paint black with black finger paint, let dry. Cut triangle shapes from black construction paper, 3 for each wing and lay them out so you can glue the two top corners to another triangle. Fasten the wings to the back of the paper plate and draw a face with white correction fluid or chalk. Punch a hole in the top to hang.
Egg Cup Spiders
Give each child a cardboard egg carton cup and four 4″ pipe cleaner pieces. Help the children poke their pipe cleaners through their egg cups to make spider legs. Have them bend the legs slightly downward. Let the children paint their spiders black and glue on plastic moving eyes.
Finger puppet ghosts
Procedure: Put white adhesive tape on each child’s index finger(over top) and add eyes with black permanent marker. Have children recite and act out with ghost fingers. Little ghost(2), flying through the air. Little ghost(2)tickling my hair. Little ghost (2) flying way down low. Little ghost (2) tickling my toe. Little ghost (2) circling all around. Little ghost (2) please sit down. And–The ghosts fly in. The ghosts fly out. The ghosts are certainly all about.The ghosts fly high and then dive low. They’re always spooky whereever they go.
Paper Bag Wig
User large paper bag that fits over head. Cut a large rectangle from front section of bag for face. Fringe bottom of bag.Curl fringe by rolling tight around a pencil.
Art
What’s Inside a Pumpkin? Materials: 2 paper plates per child, pumpkin seeds, colors, paints, or markers. Paint or color one paper plate orange. On other glue pumpkin seeds. Attach paper plates (orange one on top) with brad on top of plates.
Mr Pumpkin Head
Get a real pumpkin and supply washable markers, and props such as glasses, paper mustache, hats, scarves, and wigs. Let each child have turn to decorate and dress up pumpkin. When next child’s turn – just wash the markers off!
Pumpkin Painting
After Halloween, use your carved jack-o-lantern for print making. Cut the pumpkin into chunks and let children design pulp by using nails. Press on ink pads then on construction paper.
Ghosts
Teacher draws ghost on white paper with white crayon. Children then paint paper with dark water colors or diluted tempera paint wash. Encourage child to paint entire page. Ghosts appear through paint.
Scrap Paper Jack-O-Lantern
Draw a circle on black construction paper. Paint circle with glue. Tear scraps of orange paper into small pieces. Arrange scraps on glue. Add torn scraps of yellow paper for eyes, nose and mouth.