Find here some gift ideas that children can make at home easily for Christmas:
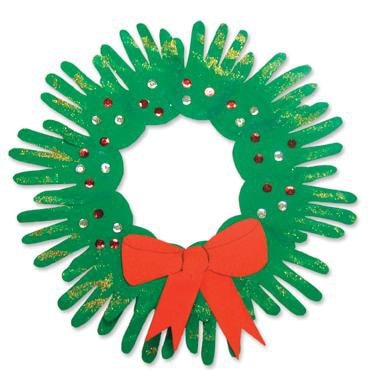
Hand prints
I went out & bought 3 Sesame Street Molds & they come with a frame. I mixed up the mixture & put their little hands in there. Then you let it dry and and they have their kids hand prints in a frame plus I have a poem to attach to it along with a picture of their child that I had taken.
Pretzel Wreath
Use the little pretzels (the ones that are shaped like a heart with a cross in the middle). Glue 1 layer of them in a circle like a wreath, then glue a second layer on top of the first joining the pretzels together over the middle of a pretzel on the first layer. You can weave ribbon between the holes if you would like. Hang with a ribbon.
Candle for Parents’ Gift
Take a baby food jar. Tear different colored pieces of tissue paper. Cover the jar using a paintbrush with glue diluted slightly with water and attach the pieces of tissue paper. Throw a few sprinkles of gold or silver sparkles. Add ribbon around the top and place small votive candle in jar. Before making, test candle size with baby food jar, as not all jars are the same so the candle sometimes will not fit.
Votive Candle Holder
Purchase clear plastic cups (8 oz.). In a small margarine tub pour white glue and dilute with water. Tear red and green tissue paper into small pieces. With a paintbrush let children paint the glue mixture onto the outside of the plastic cup then put tissue pieces on top of glue. Have them cover the entire cup. Let dry. Now a tea light candle can be placed inside and when lit shows the Christmas colors beautifully.
Gift Soap
Each child needs a bar of soap and a pretty sticker. If your stickers are a little large they will completely cover up the soap “name” on the bar (if it is marked). Have the children each choose a favorite sticker, unwrap the bar of soap, and place the sticker on top. Melt a bar of paraffin (like canning wax–very inexpensive). (melt the paraffin in a pie tin placed on top of saucepan, kind of like a double boiler).
When the wax is melted you dip the top of the soap into the wax to seal the sticker. Then the sticker will last a long time and not come off when the soap gets wet. The paraffin not only seals–it makes the soap very shiny and pretty. After it cools it is ready to be wrapped and given away. The children enjoy making something that their parents can really use! These make nice Mother’s Day presents too–Mom could put them in a drawer, like a sachet. You could use pastel soaps too and flower stickers.
Foam Magnets
Get a sheet of Fun Foam, a package of Christmas stickers, & a strip of self- adhesive magnet. Cut the Fun Foam in squares bigger than the sticker, & the magnet in about 1/2″ pieces. Give each child a piece of foam, a sticker, & a magnet. Put the sticker on the foam, trim around it as desired (leave some color from the foam showing as a border) & stick the magnet on the back. These are great for any holiday/occasion. A variation is to hot-glue a pin back to it instead of the magnet.
Simple Picture Frame Magnet
Glue wide tongue depressors in a rectangle shape. Have the children paint them & then glue crayons on the four sides. Then put a photo on the back, fitting it into the frame. Cover the back & add a magnet.
Puzzle Picture Frame
Pick up jigsaw puzzles at garage sales (the more colorful the better). Then take popsicle sticks & make a triangle shape (hot gluing them together). Then hot glue the jigsaw pieces on the popsicle sticks (as wide as you can, leaving enough space in the middle to attach the child’s picture to the back) then cut out poster board in the same size as the triangle & hot glue it behind the picture. Attach string or ribbon to hang this ornament to your tree or a magnet.
*Variation: Cut out a circle probably the size of a margarine container, & cut out a circle in the middle big enough to place the child’s photo in. Cover with puzzle pieces. Leave the puzzle pieces plain or spray paint them green to look like a wreath. Attach a small bow at the top.
Amanda at The Family Corner made a wonderful variation of this craft! Click here to see it!( pictures included)
Chocolate Dipped Spoons–for gift-giving
Melt some chocolate (I use dove bars) with a little bit of shortening in the micro. Then take strong plastic spoons and dip in chocolate and let dry. Don’t put in frig. Receiver can stir coffee or cocoa with these spoons. Also, you can cover with plastic bags–found in the candy section of a craft store–maybe lollipop covers.
Cinnamon Pomanders
2 cups powdered cinnamon, 1 to 1 1/2 cups smooth apple sauce, plastic drinking straw, tiny dried flowers, narrow ribbons, hot glue or duco cement. Mix the cinnamon with 1 cup of applesauce. The mixture will be dry and crumbly. Knead in more applesauce, a little at a time, until the mixture turns into a very firm sort of “clay”. It should not be sticky. Dust your cookie mold with cinnamon, and press in an egg-shaped piece of your cinnamon “clay”. You will have to press firmly and level the back well. You may want to use a small, sharp knife to trim off extra “clay”. If the mixture starts sticking to your hands, dust them with cinnamon.
Hold the filled cookie mold perpendicular to a wooden board. (I use a plastic cutting board or a piece of scrap wood from a lumber yard so as not to put dents into my good cutting board) and rap it quite hard several times, just as you would if you were making cookies. The edge of the cinnamon pomander should start to come away from the mold. Carefully peel the pomander out of the mold and place it on a baking sheet. Using the plastic drinking straw, cut out a neat hole at the top of the pomander. Bake your pomanders for about 2 hours in a 150 degree oven. After the first hour, remove them from the baking sheet and lay them directly on the oven racks. This will help the pomanders dry out evenly.
Remove the pomanders from the oven to a cooling rack when they feel dry and hard. When cool, tie ribbons through the holes and glue on the tiny dried flowers. If the scent of your cinnamon pomander starts to fade after some time, you can refresh it by rubbing the back with a piece of sandpaper or an emery board. This recipe makes 8 or 9 pomanders, depending on the size of the cookie mold you are using.
Fragrant Soap Balls
Have children make homemade soap balls to give as a holiday gift or just as a middle of the year surprise to someone special in their lives.
Use water to moisten Ivory Snow Flakes to the consistency of a very stiff dough. Divide the dough into several bowls. Add a different perfume and food coloring to each bowl for variety.
Have children shape large spoonfulls of the soap into balls. Have them make about three balls each. Place the balls on trays (labeled with their modeler’s name!) to harden for several days.
Have each child wrap their three soap balls in colored cellophane paper and tie the package with a pretty ribbon.
Peppermint Candy Frames
2 bags of round peppermint candy
Nonstick cooking spray
Spray clear acrylic paint
Red felt Hanging ribbon or magnet
Preheat oven to 250 degrees. Spray cookie sheets with cooking spray. Arrange unwrapped peppermints into the desired shape on the pan. Space peppermints 1/8 inch apart. Do 3-4 frames at a time. Carefully put pan in oven and bake 3-10 minutes, until mints melt into each other. WATCH VERY CAREFULLY! One minute they are normal and the next they are completely melted. Do not over-melt or the edges will bubble and become brittle. Remove from oven and gently reshape and enlarge the opening of the frame by pushing the soft mint back with a spoon or point of a butter knife.
If the mints are too hot they will stick to the spoon and if they are too cool they will be too hard to mold. While warm, peel the frames from the pan using a thin-tipped knife. Cool on the counter, moving occasionally to avoid sticking. Spray frames with clear acrylic. Insert photo and cover entire back with felt cut to fit. Attach ribbon hanger under felt or attach a magnet onto felt. I highly recommend making a trial run with one frame first. Although these are very easy to make, timing is everything and everyone’s oven varies.
Felt Button Frames
Several squares of felt of assorted colors, Miscellaneous buttons of assorted colors, Embroidery floss, Needle, “Tacky” glue, Magnet or hanging ribbon
Cut desired frame shapes using cookie cutters or by drawing freehand. You will need two identical shapes for each frame. Cut out a photo hole in one shape. Arrange your buttons on the frame. Glue or sew them into place. Glue photo onto the underside of the frame. Glue the matching back to the frame to conceal the back of the photo. Add a ribbon hanger or magnet to the completed frame.
Wooden Spoon Frame
Wooden craft spoons (4 for each frame)
1 bag assorted wooden shapes
Craft paint
“Tacky” glue
1 sheet of felt
Spray clear acrylic paint Hanging ribbon or magnet
The trickiest part of making this frame is gluing the wooden spoons together. Arrange the spoons on a work surface overlapping the handles and the rounded ends of the spoons, keeping the handles under the rounded ends. Once your frame size is determined, carefully apply glue between the overlapping spoons. While the frames are drying, paint various wooden shapes in assorted colors. Arrange the painted shapes on the frame and glue into place. When the glue is dry, spray the frame with a clear acrylic paint. Attach your photo to the underside of the frame and glue a piece of felt over the back to conceal the photo. Add a hanging ribbon or magnet to the back.
Puzzle Pieces Frame
Several handfuls of miscellaneous puzzle pieces
Spray paint or craft paint
“Tacky” glue
Spray clear acrylic paint (optional)
Felt Hanging ribbon or magnet
Scrounge into the toy bin and make good use of old puzzles. Spray or brush paint both sides of your puzzle pieces. Arrange your puzzle pieces into frames. Carefully glue pieces together. (Spray frame with clear acrylic if paint is dull.) Glue photo to back of frame and cover with felt. Attach hanging ribbon under felt or magnet on felt.


